 Back
BackVenipuncture Procedures: Blood Specimen Collection from Basic to Advanced
Study Guide - Smart Notes
 Tailored notes based on your materials, expanded with key definitions, examples, and context.
Venipuncture Procedures
Introduction
Venipuncture is the process of obtaining intravenous access for intravenous therapy or venous blood sampling. This procedure is fundamental in clinical diagnostics and patient care, requiring strict adherence to safety, hygiene, and patient identification protocols to ensure accurate results and prevent complications.
Preparation for Venipuncture
Personal Preparation and Work Area
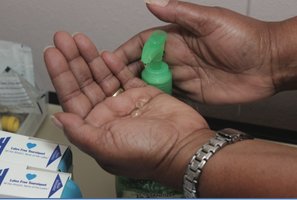
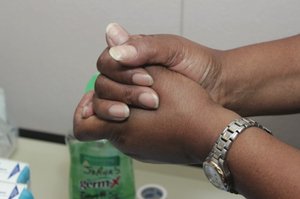
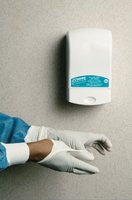
Hand Hygiene: Perform hand hygiene before and after each patient contact using alcohol-based hand rub or antimicrobial soap and water. Hands must be washed if visibly soiled.
Personal Protective Equipment (PPE): Assemble and wear appropriate PPE, including gloves (latex-free if necessary), before the procedure.
Work Area: Ensure the workspace is clean and free of debris to minimize contamination risk.

Patient Approach and Identification
Introduction: Greet the patient, introduce yourself, and explain the procedure to reduce anxiety and gain cooperation.
Patient Identification: Use at least two identifiers (e.g., name and date of birth) and verify against the test requisition. Never use room number as an identifier.
Special Considerations: Ask about fasting status, latex sensitivity, tendency to faint, and arm preference.
Hand Hygiene and Gloving
Hand Hygiene Techniques
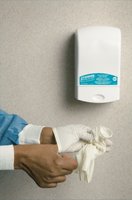
Use alcohol-based hand rub if hands are not visibly soiled; otherwise, use soap and water.
Rub hands together for at least 15 seconds, covering all surfaces.
Dry hands with a disposable towel.
Keep fingernails short and avoid artificial nails.
Gloving Technique
Wear new gloves for each patient.
Remove gloves and perform hand hygiene after the procedure.
Dispose of gloves as biohazardous waste unless otherwise specified by facility policy.

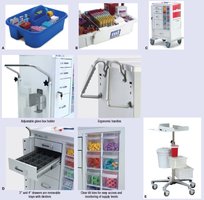
Equipment and Supplies
Essential Supplies
Gloves (latex or non-latex)
Tourniquet (single-use, latex-free)
Antiseptics (alcohol pads, chlorhexidine)
Gauze pads (no cotton balls), adhesive bandages
Evacuated tube holders, sterile needles, winged infusion sets (butterfly), syringes
Blood collection tubes (various types for different tests)
Sharps disposal container
Labels and requisition forms
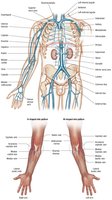
Venipuncture Site Selection
Preferred Sites
Antecubital area of the arm: Most common site due to accessibility and vein size.
Vein Choices:
Median cubital vein: First choice, centrally located, least likely to bruise.
Cephalic vein: Second choice, lateral side of the arm.
Basilic vein: Last choice, medial side, near arteries and nerves.
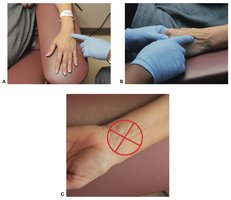
Sites to Avoid
Arms with IV lines, burns, scars, hematomas, casts, thrombosed or edematous veins, or post-mastectomy.
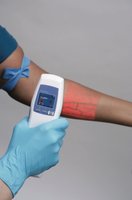
Making Veins More Prominent
Apply a tourniquet 3-4 inches above the site (not longer than 1 minute).
Position arm downward, use warming devices, or use vein visualization technology.
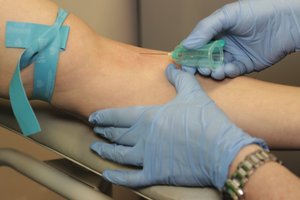
Venipuncture Procedure
Step-by-Step Process
Assemble supplies and check expiration dates.
Position patient and apply tourniquet.
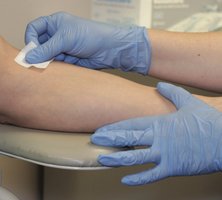
Select and cleanse the puncture site with 70% isopropanol.
Allow site to air dry.
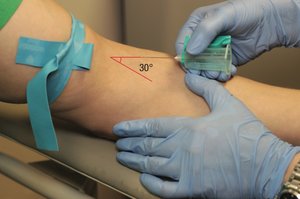
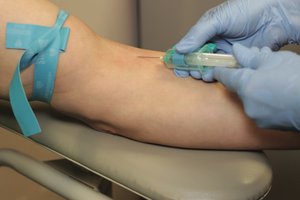
Anchor vein and insert needle at a 30-degree angle or less.
Collect blood into tubes in the correct order of draw.
Release tourniquet after blood flow begins.
Withdraw needle, apply pressure, and bandage site.
Label specimens in the patient’s presence.
Dispose of sharps and contaminated materials properly.


Order of Draw for Blood Collection Tubes
The order of draw is critical to prevent cross-contamination of additives between tubes:
Order | Tube Type | Closure Color |
|---|---|---|
1 | Blood culture tubes or vials | Yellow |
2 | Coagulation tube (sodium citrate) | Light blue |
3 | Serum tube (with/without clot activator/gel) | Red, speckled, or gold |
4 | Heparin tube (with/without gel separator) | Green or light green |
5 | EDTA tube (with/without gel separator) | Purple/lavender/pearl |
6 | Glycolytic inhibition tube | Gray |
Special Venipuncture Methods
Winged Infusion (Butterfly) Method
Used for small, fragile, or hard-to-access veins (e.g., hand, pediatric, geriatric patients).
Requires careful handling to avoid vein collapse and ensure proper blood-to-additive ratio.
Syringe Method
Used when veins are likely to collapse under vacuum pressure.
Blood is drawn gently and then transferred to collection tubes using a transfer device.
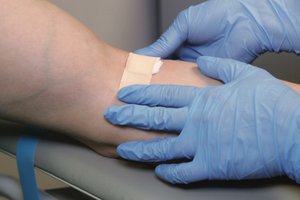
Post-Procedure Care
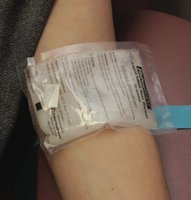
Apply pressure to the puncture site until bleeding stops.
Apply a bandage and instruct the patient to keep it on for at least 15 minutes.
Check for complications such as hematoma or continued bleeding.
Thank the patient and ensure all specimens are properly labeled and documented.
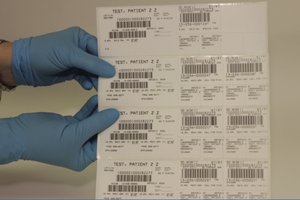
Specimen Handling and Labeling
Label all specimens at the bedside or in the presence of the patient.
Labels must include patient’s name, unique ID, date/time of collection, and collector’s initials.
Do not pre-label tubes; verify all information with the patient.
Complications and Special Considerations
Common Complications
Hematoma: Caused by blood leakage into tissues; prevented by correct needle angle and pressure application.
Hemolysis: Avoid by using appropriate needle size, not shaking tubes, and allowing alcohol to dry before puncture.
Specimen Rejection: Due to labeling errors, inadequate volume, hemolysis, wrong tube, or improper transport.
Prioritizing Specimens
Timed Specimens: Drawn at specific times for accurate monitoring (e.g., glucose, drug levels).
Fasting Specimens: Patient must abstain from food/drink (except water) for a set period.
STAT Specimens: Drawn and processed immediately for emergencies.
Needlestick Prevention and Safety
Never recap needles; dispose of immediately in puncture-proof containers.
Use safety-engineered devices and follow institutional protocols.
Report all needlestick injuries promptly and follow up as required.
Key Terms
Venipuncture: The process of puncturing a vein to obtain blood.
Tourniquet: A device used to constrict blood flow and make veins more prominent.
Hemolysis: The rupture of red blood cells, which can affect test results.
Hematoma: A localized collection of blood outside the blood vessels.
STAT: An urgent request for immediate specimen collection and analysis.
Fasting: Abstaining from food and drink (except water) for a specified period before specimen collection.
Summary Table: Venipuncture Tube Order of Draw
Tube Type | Closure Color | Purpose |
|---|---|---|
Blood culture | Yellow | Microbiology |
Coagulation (sodium citrate) | Light blue | Coagulation studies |
Serum (with/without activator/gel) | Red, speckled, gold | Chemistry, serology |
Heparin | Green | Plasma chemistry |
EDTA | Purple/lavender | Hematology |
Glycolytic inhibitor | Gray | Glucose testing |
Additional info: This guide expands on the original notes with definitions, stepwise procedures, and tables for clarity, as well as the inclusion of only directly relevant images to reinforce learning.
