Back
BackMicrobiology Lab Techniques: Streak Plate, Staining, and Microscopy
Study Guide - Smart Notes
 Tailored notes based on your materials, expanded with key definitions, examples, and context.
Microbiology Lab Techniques
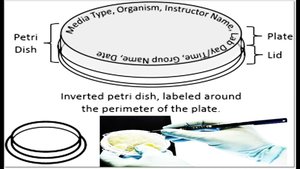
Labeling a Plate
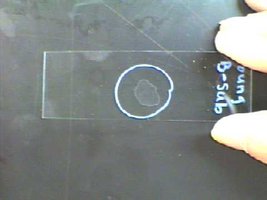
Proper labeling of a petri dish is essential for accurate identification and tracking of microbial cultures. The plate should be labeled around the perimeter with information such as media type, organism, instructor name, lab day/time, group name, and date. The labeling is done on the plate itself, not the lid, to ensure information remains with the sample even if lids are exchanged.
Streak Plate Technique
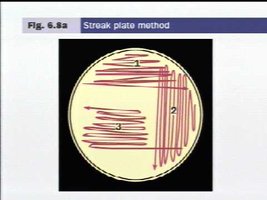
The streak plate method is a fundamental technique used to isolate pure bacterial colonies from a mixed culture. By spreading bacteria across the surface of an agar plate in a series of streaks, individual cells are separated, allowing them to grow into distinct colonies.
Rule 1: The culture is only used to create the first streak.
Rule 2: Flame the loop between streaks to prevent cross-contamination.
Rule 3: Overlap the previous streak, but do not overlap too much to ensure separation.
Procedure:
Flame the transfer loop, allow to cool, and dip into the mixed-culture broth.
Inoculate quadrant #1 of the agar with a continuous streaking motion, staying within the quadrant.
Flame the loop, allow to cool, then cross-streak once from quadrant #1 into quadrant #2.
Repeat flaming and cross-streaking for quadrants #3 and #4.
Flame the loop after the final streak to remove any remaining bacteria.
Incubate the plates.
Staining Techniques
Simple Stain and Bacterial Morphology
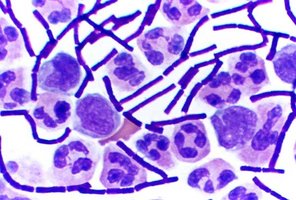
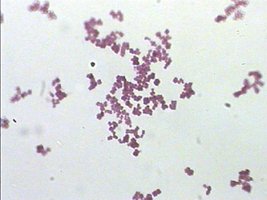
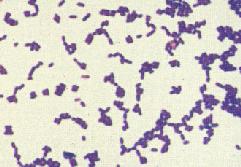
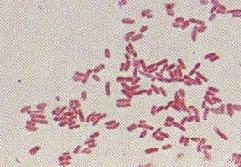
Bacteria are difficult to visualize under brightfield microscopy due to their low refractive index. Staining increases their visibility. Simple staining uses a single stain, which may be a direct (positive) or negative stain, providing information about bacterial morphology, arrangement, and relative size.
Direct Stain: Basic stains (positively charged) are attracted to the negatively charged cell wall.
Negative Stain: Acidic stains (negatively charged) are repelled by the cell wall, staining the background instead.
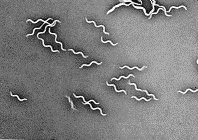
Common Bacterial Shapes:
Bacillus: Rod-shaped
Spirillum: Spiral-shaped
Coccus: Round-shaped
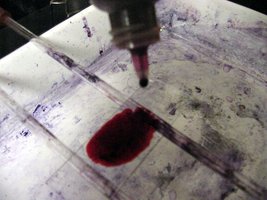
Stain Preparation
Preparing a slide for staining involves several steps to ensure contamination is prevented and staining is effective:
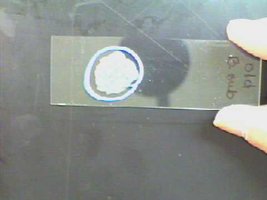
Clean and label the slide with the bacterium name and a dime-sized circle in the middle.
Spread bacteria onto the slide. Use water for bacteria from a slant or plate; broth cultures do not require water.
Allow the slide to air dry. Do not use heat to speed up drying.
Heat fix the slide by passing it rapidly over a flame with the bacteria facing up. Do not place the bacteria directly in the flame.
Stain the bacterium with crystal violet or methylene blue for 1-2 minutes, then gently rinse with tap water.
Air dry or blot dry; do not wipe the slide.
Observing Stained Bacteria
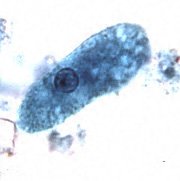
Stained bacteria are observed under oil immersion microscopy to identify their morphology and arrangement.
Negative Stain Procedure
Negative staining is used to visualize bacteria without heat fixing, preserving their natural shape. Nigrosine stain is mixed with bacteria and spread across the slide using a second slide. The slide is allowed to air dry without heat fixing, rinsing, or blotting.


Differential Staining: Gram Stain
Introduction to Differential Stains
Differential stains distinguish bacteria based on cell wall properties. The Gram stain uses two stains to differentiate between Gram-positive and Gram-negative bacteria, providing valuable information about cell wall structure.
Step 1: Apply primary stain (crystal violet).
Step 2: Add mordant (Gram's iodine) to increase binding.
Step 3: Decolorize with ethanol.
Step 4: Apply secondary stain (safranin).
Gram Stain Results
Gram-positive bacteria retain the primary stain (crystal violet) due to a thick peptidoglycan layer, appearing purple. Gram-negative bacteria lose the primary stain during decolorization and take up the secondary stain (safranin), appearing pink. False reactions may occur due to procedural errors.
Microscopy
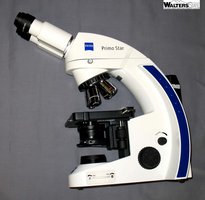
Types of Microscopes
Microscopes are essential tools in microbiology for observing microorganisms. There are several types:
Light Microscopes: Use light waves for illumination. Includes brightfield (stained microbes on bright background) and darkfield (live microbes on dark background).
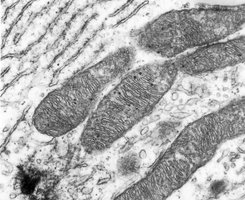
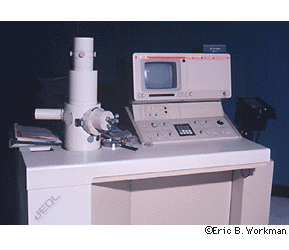
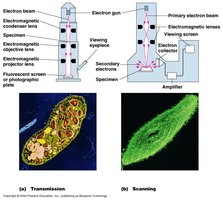
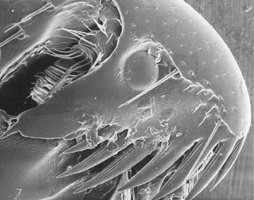
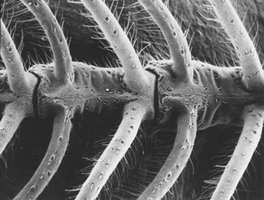
Electron Microscopes: Use electron beams for higher magnification and resolution. Includes Transmission Electron Microscope (TEM) for internal structures and Scanning Electron Microscope (SEM) for external structures.


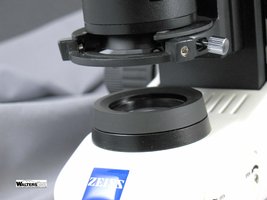
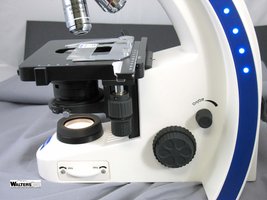
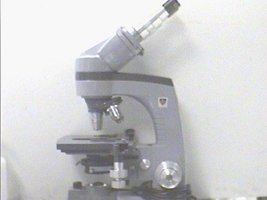
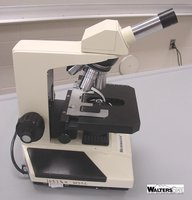
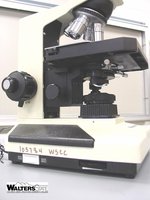
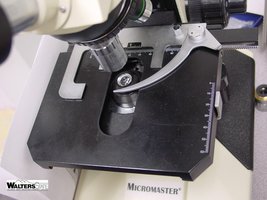
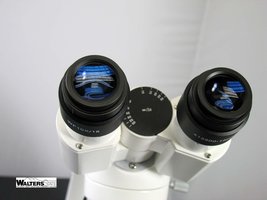
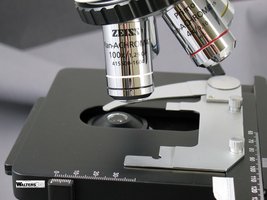
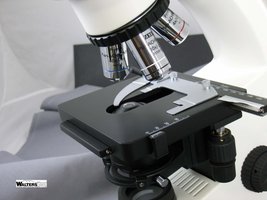
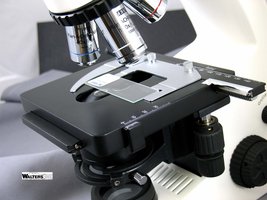
Parts of the Compound Microscope
Compound microscopes have two magnifying lenses: the ocular (eyepiece) and the objective lens. Other important parts include the stage, condenser, iris diaphragm, coarse and fine adjustment knobs, and light source.

Calculating Total Magnification
Total magnification is calculated by multiplying the magnifying power of the ocular lens by that of the objective lens:
Formula:
Example: If the ocular lens is 10X and the objective lens is 10X, total magnification is 100X.
Microscope Stage and Adjustments
The mechanical stage holds the slide in place, and the condenser focuses light onto the specimen. The iris diaphragm controls the amount of light, while the coarse and fine adjustment knobs focus the image.
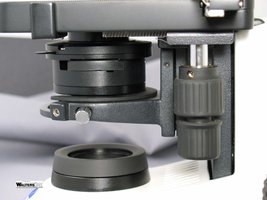
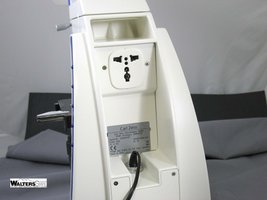
Microscope Accessories
Additional accessories include extension cord holders, light sources, and rheostat for light intensity control.