Students blog

Explore the latest trends, tips, and experiences in college life in this blog written by fellow students.

Explore posts in other areas.

PreK-12Higher EducationProfessional

  • Three rows of embroidery thread in a variety of colors with three examples of friendships laid across each row.

    Reconnect With Your Inner Child Through Friendship Bracelets

    Madeline Beavis

    Being stuck inside during the winter sometimes sends me looking for some unplugged activities. Thinking back to my summer as a camp counselor, the “it” way to pass the time was to make friendship bracelets! Whether you’re a seasoned bracelet maker or just getting started, I want to welcome you to the color world of friendship bracelets!

    I’ve been making friendship bracelets for years and I can tell you it takes a lot of practice! The foundation of friendship bracelets is very simple: a forward knot and a backwards knot. If you know how to do these 2 knots, you can read what are called “alpha patterns” and make any design!

    How To Do a Forward and Backward Knot

    If you know what the number “4” looks like, you’re already 99% of the way there!

    To make a forward knot: simply grab on to one string in your left hand - let’s call this String A - and the string to the right of it in your right hand - let’s call this String B. String A will form a “4” over String B. The end of String A will cross under String B to form the knot, and then you pull upwards to tighten.

    To make a backward knot: simply make (you guessed it!) a backwards “4” where String B crosses over String A, the end of String B crossed under String A, and pull.

    How To Read an Alpha Pattern

    An Alpha pattern is essentially a visual representation of a bracelet design arranged in a grid format with arrows corresponding to either the forwards or backwards knot. There are 4 types of arrows to be aware of.

  • A computer graphic with the Pearson logo and text: I’m a Pearson Micro-Intern.

    My Experience as a Pearson Micro-intern

    Madeline Beavis

    During the Spring 2024 semester, I had the opportunity to work as Pearson Higher Education Mathematics Micro-intern. As a mathematics major, I was intrigued by the chance to get a behind the scenes look at the product development, marketing strategies, and data analysis in an area that directly affects me as a student. Over the course of four months, I worked with Siby Sabu, a Senior Product Marketing Manager at Pearson, to learn about the ins and outs of the world of marketing and sales! I entered this micro-internship with very little knowledge. I had never taken any business-related course in college and had only had exposure to marketing through the Pearson Campus Ambassador program. Nonetheless, I was eager for this learning experience, prepared myself to become a sponge, and was excited to get started and expand my repertoire!

    Gaining Product Insight and Compiling Feedback

    One of the highlights of my micro-internship was getting to learn more about Pearson’s MyLab, textbook integration, and how the books are updated or improved. This opportunity allowed me to familiarize myself with key features and functionalities, making me feel more prepared for future projects that would inevitably come my way as a Pearson Campus Ambassador.

    Part of this process also involved listening to feedback from customers. I had the chance to sit in on some virtual calls as well as transcribe recordings aimed at reviewing a competitor’s software and comparing it to Pearson’s MyLab. As someone who has used MyLab for almost their entire college experience, it was interesting for me to hear a professor's point of view of the onboarding process, how to set up class portals and assignments, and how to organize a gradebook. This helped me to grasp the importance of customer-centricity in product development and marketing efforts.

    Research, Research, and More Research!

    One of the most surprising aspects of my micro-internship experience was how important research was. I always assumed marketing was internal, a boomerang of collaborative ideas that flowed through an organization rather than exploring outside sources, but I realized that there was also much to learn from competitors.

    I also researched topics related to marketing, specifically, different types of emails and loyalty incentives as well as sales and revenue enablement. There was so much information available to me! I was able to broaden my knowledge of effective communication techniques and learn how to craft engaging content to gain more “clicks” through concepts such as journey emails and dynamic emails. In connection to email avenues, I compiled ideas for loyalty incentives aimed at fostering customer engagement and loyalty. My research on sales collateral equipped me with a deeper understanding of the materials needed to support sales efforts. From brochures to product training workshops to demos and focus groups, I explored various collateral formats, their role in driving sales effectiveness, and possible implementations for Pearson. I even had the chance to interview my own sales representative as a Pearson Campus Ambassador to gain insight on her experience, get feedback on my research, and gauge interest. This firsthand perspective gave me a clearer perspective of the opportunities and challenges within the sales environment.

    Creativity is Key

    Creativity was a major aspect of my micro-internship which I thoroughly enjoyed since I do not have many creative outlets in my major. I was tasked with coming up with ideas for on-campus contests for college students and professors. This was an extra fun project as I got to survey my peers to gauge interest and gather feedback from current college students, ensuring that the contests would resonate with the target audience.

    As my micro-internship journey ends, I find myself reflecting on the valuable experiences and lessons learned throughout the process. Each component of the micro-internship contributed to my growth and development and opened my eyes to the wide world of marketing! Special thanks to Siby for all his mentorship, and I look forward to applying what I learned to my position as a Pearson Campus Ambassador and in all of my future endeavors!

    Do you have a compelling story or student success tips you’d like to see published on the Pearson Students blog?  If you are a college student and interested in writing for us – click here to pitch your idea and get started! 
     

  • Blog author Maddy standing outside in front of the high school where she was a student teacher.

    When the student becomes the teacher: my first adventure in student teaching

    Madeline Beavis

    What do you want to be when you grow up is a common question that children are asked in their youth. I feel very lucky that I always knew my answer. I want to be a teacher. Maybe it was because of the “superhero” teachers I met during my grade school years or maybe it was my love for learning, but I’ve always known exactly where I belonged: in the classroom.

    This led to me to my dream school Rutgers University for their undergraduate Mathematics program and Graduate School of Education where I could earn my teaching certificate. As part of my undergraduate journey, I took a class called Undergraduate Supervised Tutoring in Mathematics for aspiring high school math teachers. Through this class, I had the opportunity to work with real high school math students one day a week for a whole semester. I was able to dip my toe into what my future could look like and became a teacher... come along my journey with me!

    The First Day

    As a student teacher, you step onto a path paved with lessons and experiences both in and out of the classroom, shaping the learning experience for your students while foraging your own personal identity. I was both excited and nervous stepping into J.P. Stevens High School in Edison, New Jersey on my first day of student teaching. I knew my role was to help the teacher in any way they needed and aid student learning in three different math classes – Geometry, Algebra I and Algebra II – but I wondered what the students and staff would be like and wasn’t sure exactly what to expect. I walked through the familiar high school-esque concrete walls, metal lockers, and colorful bulletin boards. My shoes squeaked on the floor tiles as I finally made my way to room 217, period 1 Geometry where I was met with 17 pairs of curious eyes. Even though I was a stranger in their classroom, the teacher gave me a welcoming smile and introduced me to the students who I could tell were intrigued, albeit confused, at the new face in their room.

    Building Relationships

    I went into student teaching knowing it would take some time for the students to become comfortable with me. I was a new personality coming into their classroom halfway through the school year, altering their classroom dynamic and everyday habits. Some of the students were intrigued, asking me where I went to college, what I was studying, and how long I would be in their classroom, while others were more hesitant to approach me. However, one of the most rewarding aspects of teaching in general for me is having the opportunity to form meaningful connections with students and establish a safe relationship, so I spent much of my first day introducing myself to every student and getting to know them. For the next couple of weeks, I continued this practice and engaged with every student during the period, asking how they were doing or if they needed help on a problem. Eventually, walls crumbled and shells opened up to the point where the students came up to me as they entered the room before class started to tell me about their weekend or the test they just took. Externally, I was as cool as a cucumber, but inside I was jumping with joy at the progress I had made!

    Embracing Growth

    There were definitely moments of doubt and uncertainty during my student teaching when I questioned my abilities as an educator. Especially in the beginning, I often second guessed myself and overthought every single action I made. Did I explain that clearly enough? Maybe I should have said ___ instead? That was definitely confusing for that student, I’m an idiot! And sometimes, I didn’t even have an answer to a student’s question which just left me thinking wasn’t I supposed to be the one with all the answers?

    This is where my mentor teachers really helped me. They shared stories from their days of student teaching and how they felt the exact same way at first. Phew! At least I wasn’t alone. Even though I was in a “teacher” role, it was easy for me to forget that I was still a student at the same time, and this was meant to be a learning experience. I tried to adopt a growth mindset and learn as much from my students as I hoped they were learning from me. As the weeks passed, I witnessed a profound transformation within myself. Each interaction contributed to my growth as an educator, a student, and a person. I searched for feedback from the students and mentor teachers and applied it to future lessons, recognizing this as a catalyst for improvement. Through reflective practice and continuous self-assessment, I learned to spend more energy on trying to improve rather than putting myself down for mistakes or missteps. By the end of my student teaching experience, I felt I had honed my teaching skills and gained infinitely more confidence in my abilities.

    So what is one piece of advice that I would I give to future student teachers? The best piece of advice that comes to mind is to be fearless. Don’t be afraid to ask questions, don’t be afraid to accept criticism and use it to better yourself, don’t be afraid to get to know the students, and don’t be afraid to be yourself!

    Looking Towards the Future

    The end of my first student teaching journey was bittersweet. I was sad to bid farewell to my students, but I was proud of what I had accomplished and my personal growth. Amidst challenges or lack of confidence, there were so many moments of triumph – seeing the spark in a student’s eyes as they grasped a difficult concept or watching a student have an “ah-ha” moment while working on a problem. These small victories served as reminders of the profound impact that teachers have on the lives of their students, reaffirming my passion for education.

    I also knew that my student teaching journey was just getting started! Next year, I will begin my clinical phases and expand to full time student teaching! I’m so excited to embark on the next chapter of my teaching journey and learn more about what it means to be not just a good teacher, but a great one, before I have my own classroom!

    Do you have a compelling story or student success tips you’d like to see published on the Pearson Students blog?  If you are a college student and interested in writing for us – click here to pitch your idea and get started! 
     

  • A white plate with two pieces of avocado toast.

    Healthy Summer Snack Ideas

    Madeline Beavis

    It’s snack time! If you’re like me, you love to snack- whether I’m studying, watching tv, or relaxing with a book, I always have something to munch on. At school, that means I’ve usually found a bag of chips or a slice of pizza, but now that I'm home for the summer, I try to choose healthy options to nourish my mind and body. Here are three of my favorite go-to snacks for summer!

    Frozen Fruit Bowls... The Cousin of The Açai Bowl

    Ingredients and Equipment:

    • 1 large frozen banana
    • ½ cup of frozen blueberries and strawberries (or your favorite fruit combinations)
    • ½ cup Milk
    • ¾ cup yogurt
    • Granola
    • Nutribullet or blender

    Directions: (10 minutes)

    • Blend your frozen banana with a ½ cup of milk and add a ½ cup of yogurt.
    • After about 30 seconds, or when your banana is almost fully blended, start to slowly add your frozen blueberries and strawberries until blended to your liking.
    • Add the rest of your yogurt as you continue blending. You may have to add more milk depending on how thick you want your bowl to be. It can also help to put the bowl in the freezer for 1-2 minutes while you clean up!
    • Once your fruits are blended, pour the mixture into a bowl, and sprinkle your granola on top.
    • Add any other toppings you like and enjoy a healthy snack that will cool you down on a hot summer day!

    Avocado Toast... But Add a Little Bit of Spice

    Ingredients and equipment:

    • 1 avocado
    • 1 slice of whole grain bread (or a bread of your choice)
    • 1/3 cup canned corn
    • ½ tomato
    • Salt
    • Pepper flakes
    • Toaster

    Directions: (10 minutes)

    • Mash up 1 avocado in a bowl until you reach a guacamole consistency.
    • Put 1 slice of whole grain bread, or your favorite bread, into the toaster to toast while you dice your tomato into small pieces.
    • Add your corn and tomato into your avocado bowl and mix it together. Depending on the size of your avocado, add as much or as little corn and tomato as you like!
    • Once your bread is toasted, spread the avocado mix on the toast.
    • Now for the spice... sprinkle some red pepper flakes and salt on the top for some extra flavor and enjoy!

    Looking for something a little bit more filling? Scramble 2 eggs in a pan to put on top of your avocado toast!

    Chickpea Chicken Nuggets... Where Vegetables Are Hidden in Plain Sight

    Ingredients and equipment:

    • 1 can of chickpeas
    • 2 large eggs
    • ½ cup grated carrot
    • ¼ cup minced onion
    • ½ tbsp Italian seasoning
    • 1 tsp sea salt
    • ½ tsp garlic powder
    • ¼ tsp paprika
    • Sprinkle of black pepper
    • 1 tsp olive or avocado oil + extra for cooking
    • ½ cup oat flour
    • Food processor
    • Spatula and tablespoon

    Directions: (20-25 minutes)

    1. Prepare your vegetables by grating your carrots and mincing your onion. Make sure you wash your carrots first and drain out any remaining moisture with a towel!
    2. Open and drain the can of chickpeas.
      Note: Ask yourself: do I have oat flour? If not, you can substitute uncooked oats that you use to make oatmeal. Just place your oats into your food processor until you have a ½ cup!
    3. Next, add your carrots, onions, chickpeas, and the rest of your ingredients into your food processor. Pulse your food processor a couple of times until the ingredients are combined but be careful not to over mix.
    4. Moving over to the stove, heat cooking oil in a pan over medium high heat. Once heated, grab a heaping tablespoon to portion the mixture into the pan. Sometimes I even use another spoon to help me form a nugget shape in the pan!
    5. Cook each nugget for 3-5 minutes and flip using a spatula. You may have to flatten some of your nuggets before cooking for an additional 3-5 minutes on that side. When the outside of the nugget is slightly golden you know you’re done!
    6. Depending on the size of your pan, you can cook more than 1 nugget at a time and leave all finished nuggets to cool or enjoy as you cook!
    7. This recipe will yield a LOT of nuggets which you can keep in the refrigerator for 4-5 days and reheat whenever you feel like a fun vegetarian snack. Personally, I like to dip my nuggets in tomato sauce or salsa for some extra flavor!

    Do you have a compelling story or student success tips you’d like to see published on the Pearson Students blog?  If you are a college student and interested in writing for us – click here to pitch your idea and get started! 

     

  • Two photos of the blog author with her father. In the left photo she is a little girl attending a parade and in the right photo she is college age at a Rutgers stadium.

    Four Fun Ways to Celebrate Father’s Day!

    Madeline Beavis

    I have always felt like Daddy’s little girl, and I still feel the same now! My dad consistently supports my ambitions in and out of school, loves me unconditionally, helps me whenever I need it, and of course, he put up with the years of having a teenage daughter! My dad taught me how to be independent, strong, reliable, and trustworthy... and also passed down a pretty good sense of humor as well!

    Spending time with my dad on Father’s Day is very important to me, but it can be hard to think of new and exciting things to do every year. Here are some activities I love to do with my dad that you can do with a fatherly figure in your life to celebrate today!

    Soak Up the Outdoors

    My dad and I love to be active! Soak up the sun by going for a walk, hike, or bike ride and explore a new place together. This is a great way to unplug and get some exercise! You could even check out a nearby town pool or take a trip to the beach if the weather is hot!

    Play A Card Game or Board Game

    Growing up, I played a lot of games with my dad and practiced some friendly competitions. You could usually find us with a pack of cards playing Aces or Uno or stretched out around a Ludo board. Pull out your dad’s favorite game and ask if he wants to play- you can even get the whole family involved!

    Cook Dinner Together

    Even though I’m not a master chef in the kitchen, I know that my dad loves to cook and enjoys teaching me. This Father’s Day, help dad cook dinner, and maybe, just because it’s his special day, you can volunteer to do the dishes after!

    Watch A Movie

    Pop the popcorn, grab some snacks, and put on your dad’s favorite movie! I always loved watching movies with my dad and just enjoying each other's company while we watched old James Bond films or Spiderman. Find something you and your dad will both love!

    Regardless of what you choose to do with your dad this Father’s Day, he will simply love spending time with you so make sure you dedicate the day to him and remind him just how much he means to you! Happy Father’s Day!

    Do you have a compelling story or student success tips you’d like to see published on the Pearson Students blog?  If you are a college student and interested in writing for us – click here to pitch your idea and get started! 
     

  • A young woman holding a computer screen with a message from Rutgers stating ‘Application Received’.

    Five Tips for Your Graduate School Application

    Madeline Beavis

    Education is for life! After their undergraduate years, many college students want to earn a master or doctorate degree and graduate school applications can be extremely competitive, stressful, and overwhelming! Here are 5 tips from my experience applying to graduate school to help support you during your application!

    1) Identify someone for a letter of recommendation EARLY!

    Letters of recommendation are crucial for your application! Most programs will suggest you ask a professor, faculty member at your school, or supervisor who can speak to your academic, professional, and personal qualities (while family members may have many wonderful things to say about you, I recommend asking someone who is more impartial and can speak to your abilities). It is important to identify your recommender as early as possible so that you can thoroughly discuss a timeline with that person and get your application submitted on time!

    2) Update your resume.

    Some applications will require a resume (it can also be optional), but you should make sure your resume is up-to-date and relevant to your career goals! Remember that a professional resume is typically one page written in reverse chronological order. I often like to attach a cover page as well to provide more insight about my qualifications. Be sure to include employment positions, awards, or special projects you’ve completed during your undergraduate years... but your time babysitting in high school may not be as relevant anymore!

    3) Tackling the Personal Statement.

    Almost all applications will ask for a personal statement or a response to a few essay questions. Write what you want to say, not what you think your graduate program wants to hear. Authenticity is key! Tell your personal story and how that led you to choose your specific graduate program. Be creative, avoid cliches, and as I always like to remind myself, there is only one of me and I have a unique story to tell... and so do you!

    4) Oh no, there’s an interview!

    Don’t panic! While interviews can be nerve-wracking, this is an opportunity for a graduate program to learn more about who you are as a real person rather than just what they can see on paper. Prepare some responses to general interview questions, have that “tell me about yourself” response ready, and most importantly, take a deep breathe! Many graduate schools will want to know how you plan to contribute to their program, what your future ambitions are, if you have any research interests, etc. so don’t be afraid to brag about yourself!

    5) Proof, proof, proof.

    You’ve finished your application having spent hours filling out your personal information and responding to essay questions... don’t forget to proofread! After all that time and energy, be sure to double-check that the information you provided is correct, there are no typos, and you have completed each section in its entirety. I recommend reviewing your application after a good night's sleep with fresh eyes to ensure you catch any mistakes!

    While graduate applications can be stressful, any anxieties are completely normal, and I hope these tips help to relieve some of those nerves! Good luck with your application!

    Do you have a compelling story or student success tips you’d like to see published on the Pearson Students blog?  If you are a college student and interested in writing for us – click here to pitch your idea and get started! 


  • The supplies needed for the craft described in this blog, including construction paper and pencils on a student desk.

    A Timeless Gift for Mother’s Day

    Madeline Beavis

    There is nothing quite like a mother’s love! Mother’s Day is a time to thank all motherly figures for the unconditional love and support they show every day. Flowers are a very popular gift option, but what if there was a way that they could last forever? Ever since I was young, handmade gifts have been common in my family and are, especially for mothers, worth more than anything that can be bought in a store. Let me show you how I make paper flower bouquet of lavender that any mother is sure to cherish forever!

    You will need:

    • Paper in your mom’s favorite color! A shade of green will also be useful!
    • Ruler
    • Scissors
    • Tape
    • Toothpick

    Follow the steps below and use the picture at the top of the blog to help you if needed!

    • Step 1: Cut a 9 cm by 28 cm piece of green paper to make the stem of the lavender. I recommend green for a realistic outcome but be as creative as you like!
    • Step 2: Take your toothpick and starting at the tip of the corner of the paper, tightly wrap the paper around the toothpick. Continue rolling until all the paper is rolled up. You can remove the toothpick as you are rolling or leave it inside your stem for extra support. Tape the corner to hold it in place.
    • Step 3: Set aside the stem to start creating the lavender. Pick your choice of color for your lavender and cut an 8 cm by 28 cm piece of paper.
    • Step 4: Fold the paper in half like a hotdog and crease the edge.
    • Step 5: Hold your paper horizontally so that the folded side is facing you (the opening of your hotdog is away from you) and cut thin strips vertically along the crease. Do not cut all the way through! Leave about a ½ cm border at the top of the paper. At the end, it should look like a very long comb!
    • Step 6: Once you are finished, open your paper like you are reading a book and flip it over. Tape the long, uncut edges together. This is why we left a border in step 3! At this point, our lavender will look like a series of small arches.
    • Step 7: Take your stem from step 1-2 and starting at the end of your lavender, wind it around the tip of the stem so the arches are on the outside. You may need a small piece of tape to hold the lavender in place as you wind it.
    • Step 8: Continue to twist the lavender around the stem, moving slightly further down with each rotation. The small arches should expand a little bit to create a lavender shape.
    • Step 9: When you reach the end of your lavender, tape the end to hold it in place. Cut the end of your stem if it is too long and you’re all done!

    Optional: Want to include some extra details? Add some leaves!

    • Step 1: Cut a 5 cm by 7 cm piece of green paper.
    • Step 2: Leaving about a ½ cm border, like in step 5, cut out a row of long, thin triangles.
    • Step 3: With the ends of your triangles pointing up, roll the leaves around the bottom of the lavender where the bloom ends. You do not need to move down the stem, keep your rotations horizontal. Tape the ends to hold in place. Cut off any extra leaves if you do not want as many!
    • Step 4: Bend the leaves with your fingers to curl them.

    Repeat the above steps to create a full bouquet of lavender! Happy Mother’s Day!

    Do you have a compelling story or student success tips you’d like to see published on the Pearson Students blog?  If you are a college student and interested in writing for us – click here to pitch your idea and get started! 


  • Two images side-by-side. On the left, blog author Maddy stands in her high school cap and gown. On the right, Maddy stands by a huge red ‘R’ at Rutgers University.

    Calculating My Way to Education: Why I decided to be a teacher

    Madeline Beavis

    In 2008, a small, wide-eyed child would enter her first Kindergarten classroom. She would fall in love with the sights, the smells, the people, and the atmosphere. Her teachers would inspire her to be just like them when she grew up. Over the years, she would learn about the joys of reading, writing, and mathematics and anxiously wait for each school year to start again. Each teacher would plant a seed in this child’s pre-elementary school mind that would grow for the rest of her school career.

    That child was me.

    Evolving Why

    Deciding that I wanted to be a teacher was easy. I watched other kids bounce back and forth between a doctor or an astronaut or a lawyer, but my career choice has remained unchanged. However, the reason for my choice has evolved. At first, I thought teachers were just people who knew more than everyone else and had all the answers. As an adolescent, I wanted to be “smart” and share my knowledge with others. As I entered adulthood, I began to understand that, while teachers are incredibly intelligent, they are just regular people who want to make a difference. Not to mention, they are intelligent in a way that is far more valuable than what can be taught in textbooks. Teachers must have immense emotional, social, and situational intellect in order to work effectively with students. Now that I’m in college, I strive to be as well-rounded of a teacher as those I've been lucky enough to learn from when I was in grade school.

    Evolving Who

    Overall, I knew, one day, I would end up at the front of a classroom. Determining what age-group and subject I wanted to teach was not defined so early. As I moved through each grade, I always ended the year saying I wanted to teach the grade I had just finished instead of the previous grade. That came to a screeching halt when I reached high school. I enjoyed the challenge of high school subjects and liked the material that I was learning more than I ever had before. I then knew that I wanted to teach high school... but I still hadn’t picked a subject.

    Evolving What

    I loved reading while in elementary school. You could always find me somewhere flicking the pages of a book like I just couldn’t wait to get to the next chapter. Throughout middle school, I thought I had my mind made up that I would major in English in college. Easy. Done. But not quite, because when I got to high school, I fell in love with my math courses. It probably helped that I had some incredible teachers for Geometry, Pre-Calculus, and Calculus, but there was something addicting about finding that one right answer to a problem. I still enjoy reading and writing and loved my English courses too, but I knew that I didn’t have the same passion for it as mathematics.

    So, career? Teaching. Age group? High school. Subject? Math. I felt like I had all my questions answered and I was excited for the future.

    There are times where I doubt my abilities or wonder if I am good enough to be an educator, especially in a subject as difficult as math, but then I remember the unwavering confidence that my teachers had in this one child. If they believe I can do it, then so should I.

    Do you have a compelling story or student success tips you’d like to see published on the Pearson Students blog?  If you are a college student and interested in writing for us – click here to pitch your idea and get started! 


  • A laptop with Pearson+ flashcards open on the screen alongside a red mug with the Rutgers University logo.

    Pearson+ Flashcards = Studying Made Easy!

    Madeline Beavis

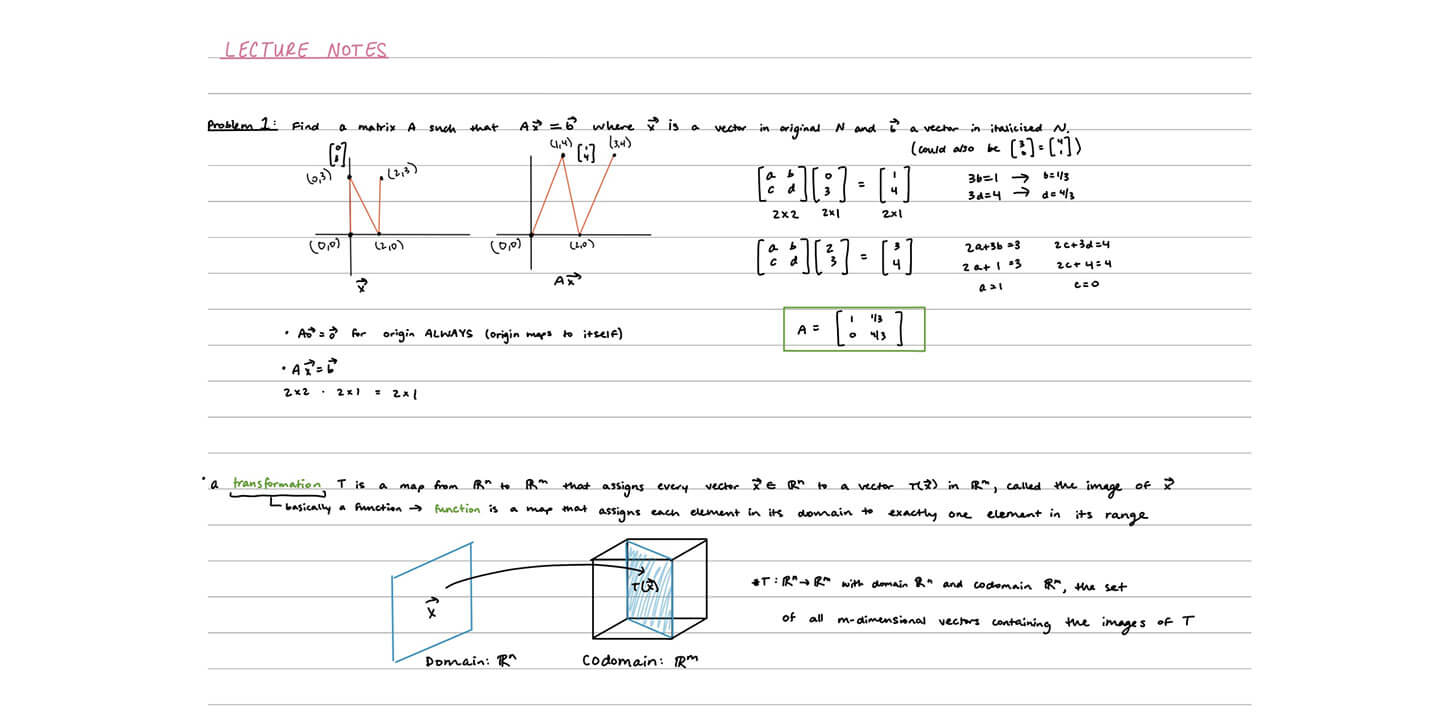
    Did you know Vector Space Axiom #5 states that for all x included in a vector field V, 1•x = x? Well, I didn’t either prior to using Pearson+ Flashcards. That is just one axiom out of eight that I had to memorize for my Linear Algebra Class. For me, memorization is hard. It takes me a lot of time, energy, and concentration to memorize even just a short list of definitions. I find that making flashcards is a great way to practice and make sure I’m ready for my next exam, and where better to turn to than Pearson+!

    Efficient Active Learning

    With Pearson+ flashcards, I can engage in active recall. Active recall is essential for long-term retention, and flashcards make for efficient, targeted learning for busy college students! There are numerous ways to practice with these digital flashcards including selecting from multiple-choice options, typing in an answer, or the traditional “flip” to view the answer. The options vary each time you practice a set to guarantee you master your vocabulary! You can even have some fun and play a matching game!

    Self-Paced Learning

    Everyone learns at a different pace – no need to fear timers or alarm bells! I love that I can take my time with each flashcard and think about my answer before checking if I’m correct. Since flashcards allow for instant feedback, I can focus on the material I find most challenging and review it until I reach a point of mastery, creating a more personalized learning experience. And don’t worry, you can always add, delete, or edit your flashcards with exact about of information as you see fit!

    Portability

    The best feature of all is that no matter where I go, I can take my flashcards with me! Rather than having to carry around different sets for all my classes, everything is now in one place and just a click away. Whether I’m sitting on the bus on my way to class or looking for a way to pass the time between classes, I can conveniently access my flashcards on my computer, tablet, or phone.

    Check out this helpful video on Pearson+ flashcards and make your studying easier by taking your flashcards to the next level with Pearson+!

    Do you have a compelling story or student success tips you’d like to see published on the Pearson Students blog?  If you are a college student and interested in writing for us – click here to pitch your idea and get started!