Recording Quality Music (On a College Budget)
Recording professional-sounding music on a college budget may first seem impossible, however it is not only feasible, but an opportunity to input your creativity into every process. You don’t need a high-end studio to produce great tracks. Instead, focus on technique, affordable tools, and optimizing your recording environment. Here are a few tips on how to put together high-quality songs without draining your bank account.
Optimize Your Recording Space
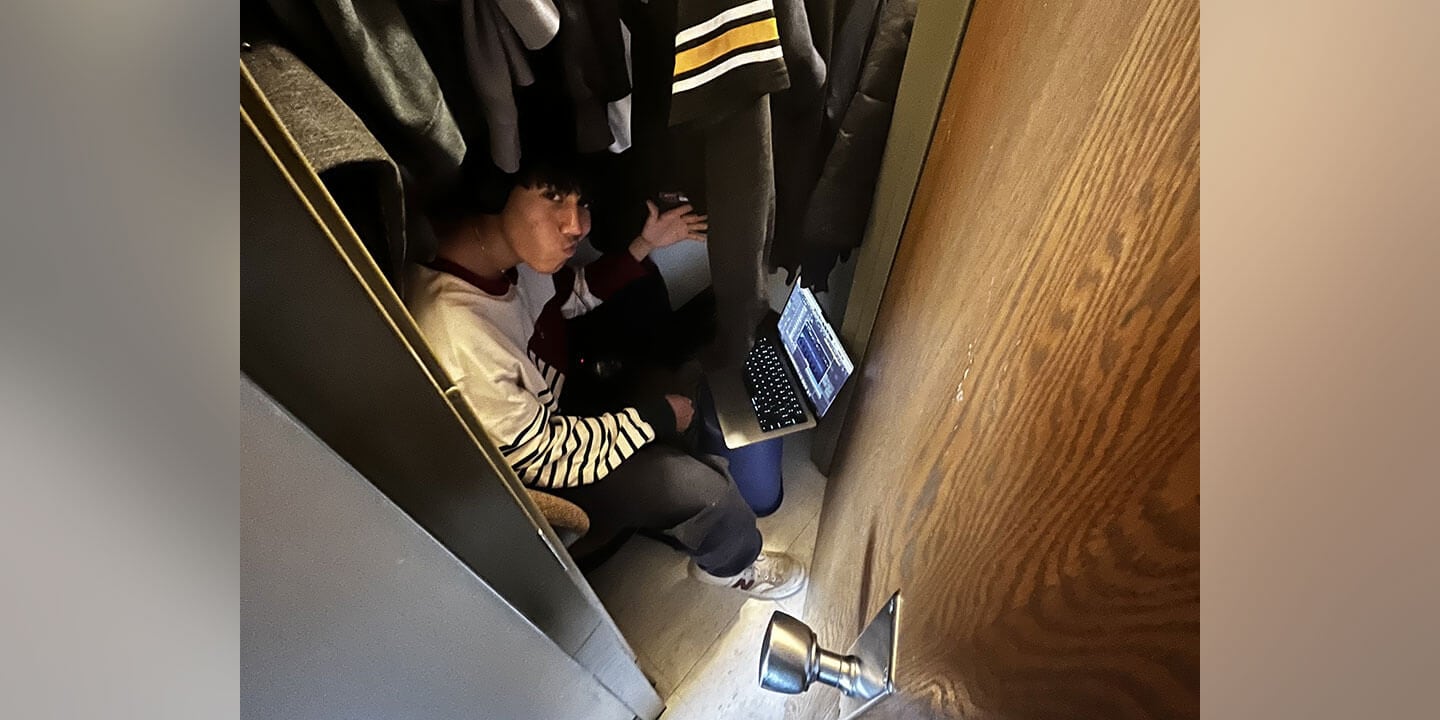
If you’re recording in a dorm or small apartment, you can use thick blankets or moving pads to dampen reflections. Isolating areas with the most unwanted room noise is the key, focusing on creating smaller spaces within larger ones. For vocals, try recording in a closet, as the fabric is great at absorbing unwanted reverberations. If you’re micing an amp or acoustic instrument, a similar closet technique can work wonders if you have the space. Rugs and carpet can also be useful for containing sound in rooms with harder floors.
Choose Affordable (or Free) Gear
Start with a solid, budget-friendly microphone like the Shure SM57 or SM7B or any cheap large diaphragm condenser such as the Audio-Technica AT2020 or the AKG P220. Pair it with an affordable audio interface, such as a Scarlett Solo or anything that doesn’t have DI quality loss and that can provide clean preamps. For monitoring, opt for flat-response headphones like the Audio-Technica ATH-M30x or something from Sennheiser’s HD series, which will help you mix accurately without need for studio monitors. Most production can be tackled in the box these days, so focus on getting the best signal into your computer first and foremost.
Use Free or Low-Cost DAWs & Plugins
Professional DAWs can cost hundreds, but there are many free and low-cost alternatives. If you’re on Mac, GarageBand is a powerful starting point with built-in instruments and effects. Windows users can take advantage of Cakewalk by BandLab, another fully featured DAW that’s completely free. Reaper offers a 60-day free trial and only costs $60 afterward, making it a steal for its capabilities. For plugins, lookout for free options like iZotope’s Vinyl (for lo-fi effects), Spitfire LABS (for high-quality virtual instruments), and Valhalla Supermassive (for lush reverbs and delays). Tools like these will elevate your production and save a penny at the same time.
Learn Basic Mixing Techniques
Even the best recordings fall flat without proper mixing principles. Learn to use EQ, compression, and different plugins like saturation and modulation effects to play with tone color while also creating a cohesive mix. When using reverb and delay, apply them subtly to avoid washing out. Panning left or right can also help to create a more immersive soundstage. Most importantly, reference mixes on multiple playback systems (headphones, car stereo, etc.) and use professional references to ensure they translate well to wherever your music is distributed.
Collaborate & Share Knowledge
The final tip, and the best way to improve while staying budget-conscious is collaboration with other musicians. Join music groups, swap feedback, or even share gear! You might find someone with better microphones or a different DAW who can enhance your recordings. Plus, learning from others accelerates your own growth and can lead to unexpected creative breakthroughs.
Final Thoughts
Great music isn’t about how much you spend; it’s about how you use what you have. By optimizing your space, choosing smart gear, leveraging free software, and honing your creative skills, you can produce tracks that rival professional recordings. The key is to keep experimenting, keep learning, and most importantly, keep creating. Your passion and resourcefulness will always matter more than the price tag of your equipment.
Do you have a compelling story or student success tips you’d like to see published on the Pearson Students blog? If you are a college student and interested in writing for us – click here to pitch your idea and get started!
About the author

Damion Vidal Garcia
As a current student at the University of Colorado Boulder's Leeds School of Business, where he is also a Pearson Campus Ambassador, Damion is deeply passionate about the intersection of music production and media. Hailing from the small town of Alamosa, Colorado, he brings a unique perspective shaped by close-knit communities and a love for creativity. Damion is actively honing skills in marketing, business development, and creative production, with a keen eye on emerging trends and technologies. His goal is to leverage his diverse background and education to contribute fresh ideas and drive impactful change in the dynamic world of entertainment. He is eager to explore collaborative opportunities, and to push the boundaries of media and music together.